Note: To view a request and its results, the quickest method is to use Search Requests. To view the article click here.
From the Results/Requests screen, results can be manually entered, validated, printed, and/or deleted by users according to their assigned roles in the laboratory departments.
The following screenshot image indicates where these options are situated on the screen:

Please note:
- Results will flag a specific colour to alert the user.
- Only authorized persons can enter and/or validate results.
- Click on the history events, on the top-right side of the screen in the Request info field, to view all the events linked to the request, including result entry, validation, and sign off.
Results Entry
To manually enter results:
- Click on 'Enter' in the Test Results options field on the right side of the Results screen, as indicated below:

The following window will appear:
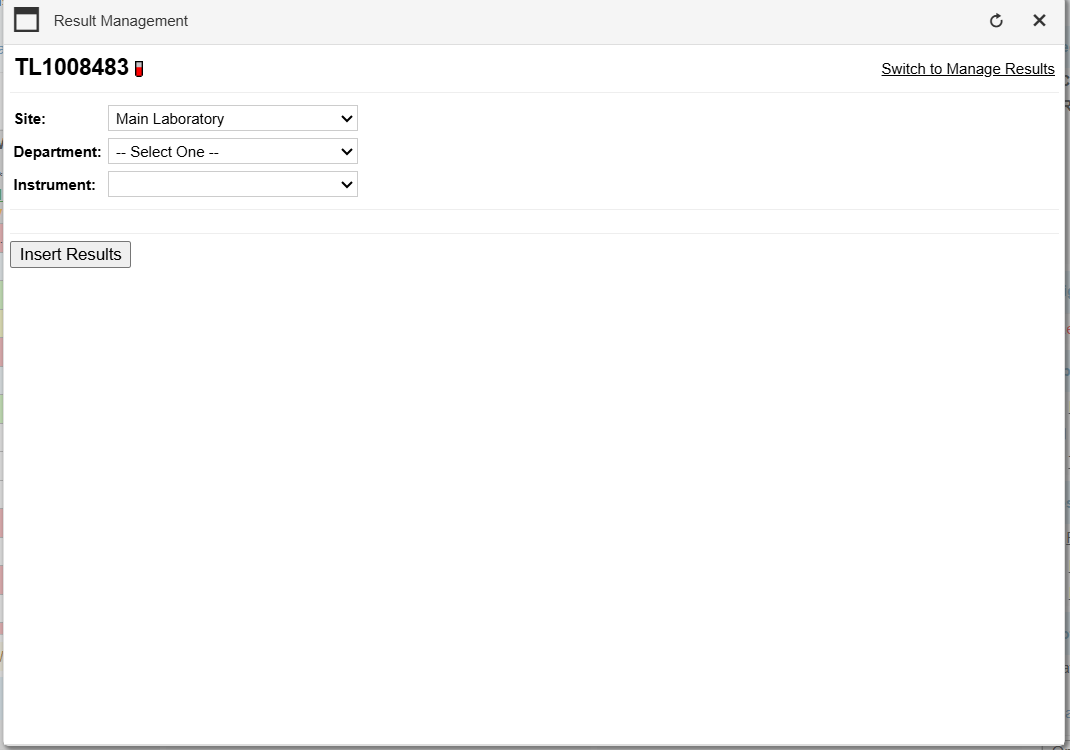
*Warning* Make sure you are at the correct location (top right corner) before adding or deleting results.
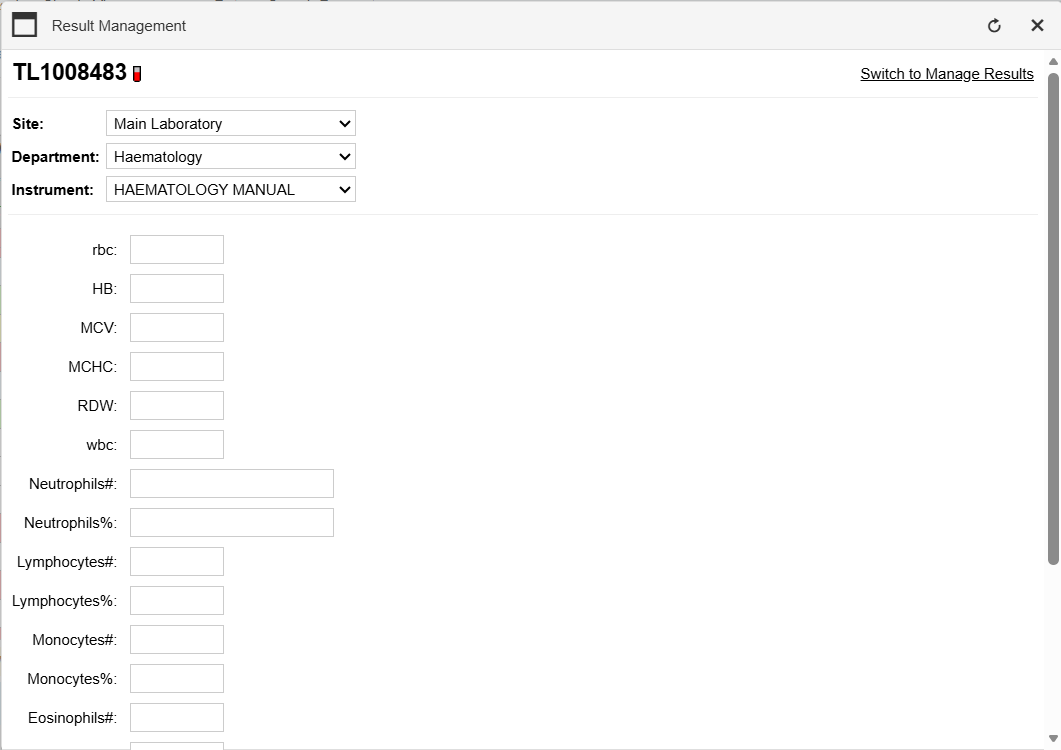
On the drop down select the department and instrument and then click Insert Results
The tests will appear as follows
The entered results will now appear in the following manner:
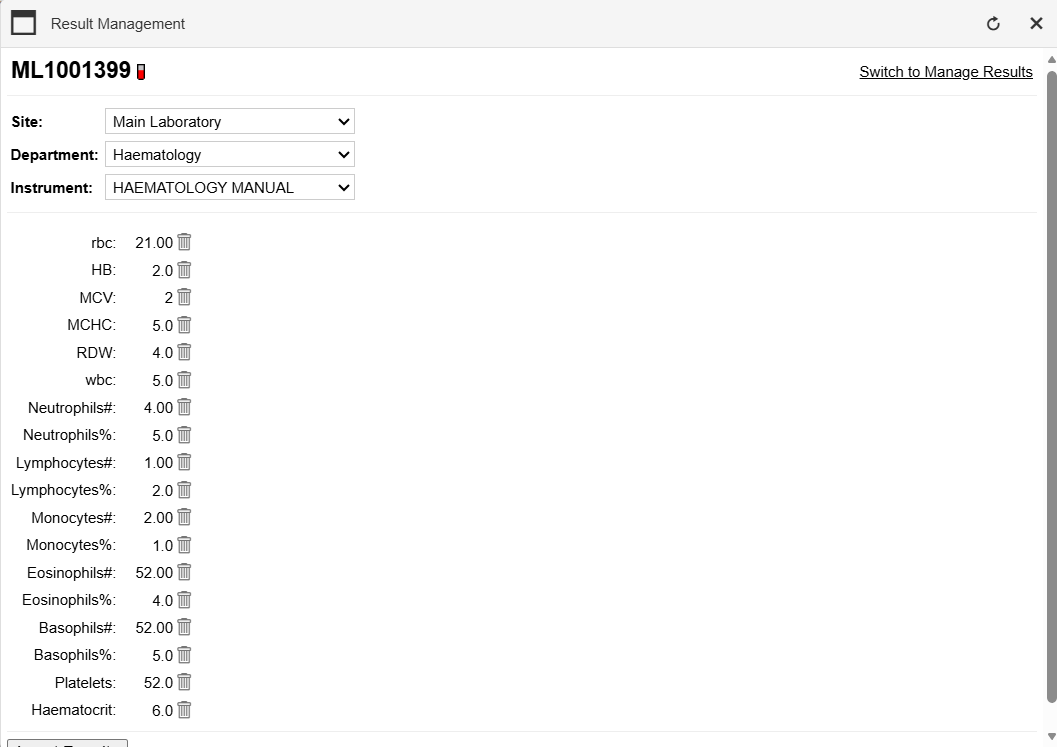
- Click on the delete (trashcan) icon
 to delete results.
 - Re-enter the result (or leave it empty) and click on the 'Insert Results' button, or push 'Enter' on the keyboard.
- Close the window with the 'X' button on top right-hand corner, or click on 'Switch to Manage Results' to switch to the Manage Results window.
Manage Results
To manage results:
- Click on 'Switch to Manage Results' from Results Entry window.
- Or click on 'Manage' in the Test Results options on the right side of the Results screen, as indicated below:

The following window will appear:

Here you can view results as they are show on the Results screen, delete them individually, delete the whole run, or undeleted previously deleted results.
- Click on the trashcan icon to delete individual results.
- Click on 'Delete Run' (above each column) to delete all results below.
- Click on 'Undelete Deleted Tests' at the bottom (scroll down if its out of view) to undo deletions.
- Close the window with the 'X' button on top right-hand corner, or click on 'Switch to Manual Entry' to switch back to the Manual Entry window.
Manual Diff

- The Diff Haematology test is most commonly an interfaced test, however manual results can be entered by using the option indicated above.
Validate Results
To manually validate results:
- Click on 'Validate All' at the top of each result column on the Results screen, as indicated below:

As shown above, the results will have a green V next to them when validated. Hover your mouse pointer over the V to see who validated them, or if they were auto-validated by the system.
Print Results
To print results:
- Click on 'Print Single' (single department's results) or 'Cumulative' (all department's results) in the Test Results options field on the right side of the Results screen, as indicated below:

Microbiology
Microbiology Results Entry has a differing method of Results Entry. To view the article click here.